You’ve found the perfect moment — golden hour light streaming through a window, your subject positioned just right, the composition framed beautifully. You press the shutter, check the screen, and your heart sinks. The image is muddy, shadows swallow the details, and the colors look nothing like what your eyes saw. It’s a frustration nearly every hobbyist photographer knows intimately, and the culprit is almost always the same: inadequate lighting.
Professional photographers invest thousands in lighting equipment, but that doesn’t mean stunning results require a studio-sized budget. Whether you’re shooting portraits in your living room, documenting products for an online shop, or creating content for social media, affordable lighting solutions can dramatically transform your work. The gap between amateur and professional-looking photos often comes down not to the camera body or lens, but to how well you control and shape light. This article walks you through practical, budget-friendly strategies for upgrading your photography lighting — from understanding the basics and choosing the right gear for your needs, to exploring cost-effective tools like portable LED panels, softboxes, and versatile accessories that deliver real results without draining your wallet.
Understanding the Fundamentals of Photography Lighting
Light is the single most important element in any photograph — it determines mood, depth, clarity, and color accuracy. Before spending a dollar on new gear, understanding a few core concepts will help you make smarter choices and get more from whatever equipment you already own.


The first distinction worth grasping is hard light versus soft light. Hard light comes from small, direct sources like bare bulbs or midday sun, casting sharp shadows and emphasizing texture. Soft light, produced when a source is diffused or spread over a larger area, wraps gently around your subject, minimizing harsh shadows and creating a more flattering, even look. Most hobbyists find soft light far more forgiving and easier to work with across different shooting scenarios.
Color temperature matters just as much. Light sources range from warm (around 2700K, like candlelight) to cool (above 6000K, like overcast sky). Mixing color temperatures in one shot creates unnatural casts that are difficult to correct in post-processing, so consistency is key. Finally, consider the direction of your light — front lighting flattens features, side lighting adds dimension and drama, and backlighting creates silhouettes or a luminous rim effect. Mastering these basics means you won’t need the most expensive equipment to produce compelling images; you’ll simply need the right light, placed thoughtfully, and shaped to suit your vision.
How to Choose the Right Photography Lighting for Your Projects
Picking the right lighting setup starts with one honest question: what are you actually shooting? A portrait photographer working in a spare bedroom has entirely different needs than someone photographing jewelry for an Etsy store or filming YouTube tutorials outdoors. Your subject matter, shooting environment, and budget should drive every decision — not flashy marketing or feature lists you’ll never use.
For portrait and lifestyle photography, soft, diffused lighting is your best friend. You’ll want sources large enough to wrap light around faces and minimize unflattering shadows, which means prioritizing modifiers like softboxes or umbrella diffusers over bare-bulb setups. Product photographers, on the other hand, need precise, consistent illumination — often from multiple angles — to reveal texture and eliminate unwanted reflections. A two-light setup with adjustable brightness and color temperature gives you the control this work demands without professional-grade expense.
Environment plays an equally important role. If you shoot primarily indoors in a dedicated space, continuous LED panels or a basic softbox kit mounted on light stands offer reliability and repeatability. If you’re frequently on location — capturing events, street portraits, or outdoor content — portable lights become essential. Compact, battery-powered LED panels that slip into a camera bag give you fill light anywhere, whether you’re in a café, a park, or a client’s living room. Look for models with adjustable color temperature ranging from warm tungsten to cool daylight so you can match ambient conditions seamlessly.
Budget-wise, resist the temptation to buy everything at once. Start by identifying your single biggest lighting problem — maybe it’s harsh overhead shadows in your home studio, or maybe it’s the lack of any supplemental light outdoors. Solve that one problem first with a targeted purchase. A single well-chosen portable LED panel or an affordable softbox kit often delivers a more noticeable improvement than scattering your budget across multiple accessories. Once you see results and understand how that first tool behaves, you’ll make far smarter decisions about what to add next. Think of building your lighting kit as an iterative process: each piece should address a specific gap in your workflow rather than checking a box on a generic gear list.
Top Cost-Effective Photography Lighting Solutions
You don’t need to empty your savings account to see a dramatic leap in your photo quality. The lighting market has shifted significantly in recent years, with manufacturers producing genuinely capable tools at price points that would have been unthinkable a decade ago. The key is knowing which categories of gear deliver the most impact per dollar and how to combine them into a cohesive setup that grows with your skills.
Ulanzi Lights: Affordable and Versatile Lighting Tools
Ulanzi has carved out a reputation among hobbyists and content creators by offering compact, well-built lighting tools that punch above their price class. Their LED panels and mini light wands feature adjustable brightness and color temperature, making them adaptable for everything from tabletop product shots to quick portrait fill. Many models include cold shoe mounts and magnetic attachments, so they integrate seamlessly with cameras, tripods, and phone rigs you likely already own. For photographers testing the waters with supplemental lighting, Ulanzi provides a low-risk entry point that still delivers noticeable results.
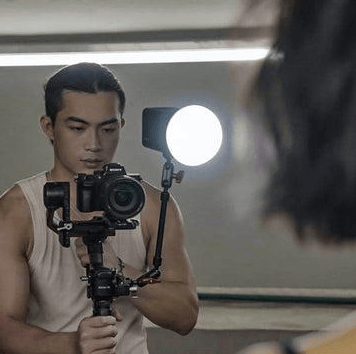
Portable Lights for On-the-Go Photography and Videography
Portability changes how and where you can shoot. Compact LED panels — often no larger than a smartphone — run on built-in rechargeable batteries and tuck into any camera bag without adding significant weight. They’re invaluable for filling shadows during outdoor portraits, adding a catch light to eyes in dim environments, or illuminating details at events where setting up stands isn’t practical. When comparing options, prioritize battery life, CRI rating above 95 for accurate color, and stepless dimming so you can dial in exactly the output you need without overpowering a scene.
Softbox Lighting: Achieving Soft and Professional Illumination
A softbox transforms a small, harsh light source into a broad, diffused one — and that single change can make amateur shots look remarkably polished. Budget softbox kits typically pair a continuous LED or fluorescent bulb with a collapsible fabric enclosure and a light stand, giving you a ready-made portrait or product setup for a fraction of professional strobe costs. Position a softbox at roughly 45 degrees to your subject and slightly above eye level for classic, flattering illumination. For tighter spaces, look for strip softboxes or lantern-style modifiers that offer soft wraparound light without demanding a large room.
Essential Lighting Accessories to Maximize Your Setup
Sometimes the smartest lighting upgrade isn’t another light — it’s an accessory that makes your existing gear work harder. A five-in-one reflector (typically under twenty dollars) lets you bounce, diffuse, or flag light with a single collapsible disc. Clamp-on barn doors and honeycomb grids help you control spill and direct light precisely where you want it. Adjustable light stands with sandbags keep everything stable and safe, while color gel sets allow you to match mixed ambient sources or add creative tints. These small investments compound quickly, giving you far more flexibility than any single light could on its own.
See also: Why Bus Accidents Can Cause Serious Injuries
Step-by-Step Guide to Implementing Your Lighting Solutions
Knowing which tools exist is one thing — putting them to work effectively is another. This straightforward process will help you move from frustration to noticeably better images without wasting time or money on gear you don’t actually need.
Start by auditing your current situation. Take a few test shots in the spaces where you typically work, paying close attention to where shadows fall, whether skin tones or product colors look accurate, and how much detail you’re losing in highlights or dark areas. These images become your baseline. Identify the single most persistent problem — maybe it’s deep under-eye shadows in portraits, or dull, flat lighting on product shots that makes textures disappear. That specific pain point tells you exactly where to invest first.
Next, match the problem to a solution. Harsh shadows on faces? A softbox positioned at 45 degrees or even a simple five-in-one reflector bouncing window light can resolve that immediately. Shooting on location with no control over ambient light? A compact portable LED panel with adjustable color temperature gives you fill light you can fine-tune on the spot. For product work that looks inconsistent from shot to shot, a two-light setup with matched color temperatures and a pair of small diffusers creates repeatable results every session.
Once your new gear arrives, resist the urge to use everything simultaneously. Set up one light source, take test shots, and adjust its position, brightness, and angle methodically. Move it closer for softer light, pull it back for broader coverage, raise it to sculpt cheekbones, or lower it to reduce nose shadows. Photograph the same subject from the same angle with each adjustment so you can compare results side by side. This deliberate testing teaches you more in thirty minutes than weeks of random experimentation. If budget is especially tight, explore DIY alternatives before buying — a white foam board from a craft store works as a surprisingly effective reflector, and a sheer white shower curtain draped over a frame diffuses harsh window light beautifully. Build your kit piece by piece, letting each addition solve a real problem you’ve already identified rather than one you imagine you might encounter someday.
Start Small, Light Smart, and Build Your Kit With Purpose
Great photography lighting doesn’t demand a professional budget — it demands thoughtful choices. By understanding the fundamentals of how light behaves, from its quality and color temperature to its direction, you gain the ability to shape any scene with intention rather than guesswork. Choosing gear that matches your specific shooting needs, whether that’s a compact portable LED panel for on-location work or a softbox kit for consistent indoor portraits and product shots, ensures every dollar you spend directly improves your results.
Cost-effective tools like Ulanzi lights, budget softbox setups, and simple accessories such as reflectors and gels have made quality lighting accessible to hobbyists at every level. The most important step is simply to start — pick the one lighting problem that frustrates you most, solve it with a single targeted purchase or even a DIY workaround, and build from there. Each addition to your kit teaches you something new about controlling light, and that knowledge compounds over time. You don’t need a room full of expensive strobes to create images that stop people mid-scroll. You just need the right light, placed with care, and shaped to match your creative vision. Start small, experiment often, and let your results guide your next investment.