Electric mountain bikes have surged in popularity over the past few years, drawing in casual riders who want to explore rugged trails without the physical demands of a traditional bike. With powerful motors and long-range batteries, e-MTBs open up terrain that once felt out of reach — but getting to those trailheads comes with its own set of hurdles.
For riders with fat tire e-MTBs, transport is one of the most overlooked yet critical parts of the experience. These bikes are heavier, wider, and bulkier than standard models, which means tossing them in the back of a car or using a basic rack simply won’t cut it. A poor setup can damage your bike, your vehicle, or both before you even hit the dirt.
This guide is designed to help casual riders navigate every step of the process with confidence. You’ll find practical advice on choosing the right fat tire bike rack for your vehicle, a clear walkthrough for transporting your e-MTB safely, essential e-MTB cleaning tips for after those muddy rides, and straightforward guidance on keeping your long-range battery in top condition. Whether you’re heading out on weekends or planning longer trail adventures, these solutions will help you ride smarter from start to finish.


The Unique Transport Challenges of Fat Tire Electric Mountain Bikes
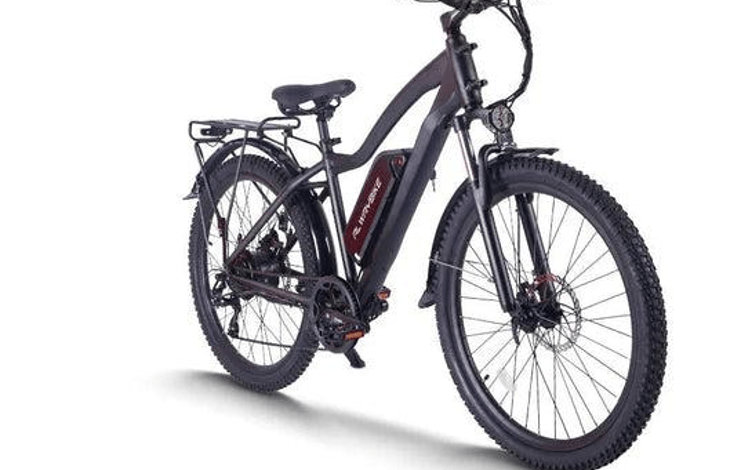
Fat tire electric mountain bikes are a different beast compared to your average trail bike. A typical e-MTB tips the scales anywhere from 50 to 70 pounds, and that’s before you factor in the added bulk of a long-range battery pack. Tires on these machines often measure 4 inches wide or more, which creates immediate compatibility issues with most standard bike racks designed for narrower profiles. The motor housing and frame geometry also tend to be chunkier, making it harder to find a clean, stable contact point when securing the bike for transport.
The risks of cutting corners here are real. An improperly secured electric mountain bike can shift during transit, scratching the frame, cracking the display, or — in a worst-case scenario — falling off the rack entirely at highway speeds. Vibration over rough roads can loosen connections to the motor or battery if the bike isn’t properly stabilized. Even your vehicle can take a hit: overloaded trunk racks can warp hatch panels, and roof-mounted bikes on low-clearance vehicles are a recipe for a parking garage disaster.
Casual riders often underestimate these risks because they’re used to handling lighter, simpler bikes. But the combination of extra weight, wider tires, and sensitive electronics demands a more deliberate approach. Investing in the right equipment and taking a few extra minutes to secure your bike properly isn’t just about protecting your gear — it’s about making sure every ride starts and ends without incident.
Selecting the Perfect Fat Tire Bike Rack for Your e-MTB
Choosing the right fat tire bike rack is the single most important decision you’ll make before transporting your e-MTB. The wrong choice doesn’t just risk your bike — it can compromise your vehicle and everyone else on the road. Three main rack types are worth considering: hitch-mounted, roof-mounted, and trunk-mounted, each with distinct trade-offs depending on your setup.
Hitch-mounted racks are the gold standard for fat tire e-MTBs. They sit low, making it easier to load a heavy bike without lifting it overhead, and they typically support the weight demands of electric bikes far better than other options. Look for a 2-inch hitch receiver for maximum stability, and confirm the rack’s listed weight capacity exceeds your bike’s actual weight by a comfortable margin. Roof racks work well if you have a taller vehicle and don’t mind the extra effort of lifting, but they’re a poor match for riders who frequently encounter parking garages or low overhangs. Trunk racks are the least recommended option for e-MTBs — they’re generally not built for the weight and can flex or shift under load.
Key Features to Look For in a Fat Tire Bike Rack
Beyond rack type, specific features make a meaningful difference. Adjustable wheel trays or cradles that accommodate tires up to 5 inches wide are non-negotiable for fat tire compatibility. Integrated locking mechanisms — both for the bike to the rack and the rack to the hitch — deter theft during trailhead stops. For e-MTBs, look for racks with frame contact pads to protect the finish, and avoid designs that clamp directly onto the top tube, which can stress the frame under the bike’s added weight. Riders who own purpose-built fat tire e-MTBs, such as those from Cemotobike, will find that pairing their bike with a rack specifically rated for wide tires and higher weight limits makes the entire transport process noticeably more secure.
A Step-by-Step Guide to Transporting Your e-MTB Safely
Even with the right rack in place, transporting your e-MTB safely comes down to following a consistent process every time you load up. Rushing through the setup is where most damage happens, and a few extra minutes of preparation can save you a costly repair or a ruined ride day.
Start with the battery. Most e-MTB manufacturers recommend removing the battery pack before transport, particularly for roof-mounted setups where the added height and weight create unnecessary stress. If your rack is hitch-mounted and sits close to the ground, keeping the battery installed is generally fine — but make sure it’s fully locked into the frame and the charge port cover is secured. Check your tire pressure before loading as well; properly inflated tires help the bike sit more stably in the wheel trays and absorb road vibration more effectively.
When loading the bike, position it so the heavier end — typically the motor side — sits closest to the vehicle. On a two-bike hitch rack, place your e-MTB on the side with the most structural support. Engage all wheel straps snugly but without overtightening, which can deform fat tires over a long drive. Use the frame strap at a strong point on the downtube, never across cable housing or the display unit.
Once loaded, give the bike a firm shake in multiple directions. If anything moves, tighten it before leaving. During the drive, avoid aggressive acceleration and hard braking, and pull over to recheck straps after the first 10 to 15 minutes on the road — straps can settle slightly once the bike bears its own weight in motion.
Pre-Transport Checklist
Before every trip, run through these essentials: confirm the hitch receiver bolt is torqued tight, verify the rack’s anti-wobble mechanism is engaged, check that frame pads are positioned over all contact points, and ensure no cables or accessories are hanging loose where they could catch wind or snag. A quick visual inspection of the rack’s connection points takes under two minutes and eliminates the most common causes of in-transit problems.
See also: Securing Your Future: Understanding Life Insurance in Australia
Essential e-MTB Cleaning Tips After Muddy Rides
A hard day on wet, muddy trails is exactly what fat tire e-MTBs are built for — but what happens after you get back to the trailhead matters just as much as the ride itself. Skipping a proper post-ride cleaning doesn’t just leave your bike looking rough; it accelerates wear on drivetrain components, traps moisture against the frame, and can cause electrical connectors to corrode over time. Building a simple cleaning routine into every ride day is one of the most effective e-MTB cleaning tips you can follow.
Start with a low-pressure rinse to knock off the bulk of the mud. Avoid pointing a pressure washer directly at the motor housing, battery port, display unit, or any connector covers — high-pressure water can force its way past seals that aren’t designed to handle it. A garden hose on a gentle setting, or a bucket and sponge, gives you enough cleaning power without the risk. Work from the top of the bike downward, letting gravity carry the dirty water away from components you’ve already cleaned.
Once the mud is off, use a soft brush and mild bike-specific cleaner on the drivetrain — the chain, cassette, and derailleur accumulate grit that plain water won’t shift. After rinsing, dry the bike thoroughly with a clean cloth, paying close attention to the area around the battery terminals and motor connections. Leave the battery port cover open briefly in a dry environment to let any trapped moisture escape, then close it securely. Finish with a light application of chain lubricant, and your bike will be ready to perform at full capacity on the next outing.
Caring for Your Long-Range Battery: Tips for Longevity
Your long-range battery is the most expensive component on your e-MTB, and how you treat it during transport and storage directly affects how long it lasts. Heat is the primary enemy — leaving a battery inside a hot vehicle, even for an hour, degrades cell capacity faster than normal cycling ever would. If you’re parked at the trailhead on a warm day, remove the battery and store it in a shaded, ventilated spot rather than leaving it baking in the car.
For charging, avoid consistently topping the battery to 100% unless you need the full range for that specific ride. Most manufacturers recommend keeping charge levels between 20% and 80% for everyday use, reserving full charges for longer outings. After a ride, let the battery cool to room temperature before plugging it in — charging a hot battery accelerates wear on the cells. During winter storage or extended breaks from riding, store the battery at around 50% charge in a cool, dry location, and check the charge level every few weeks to prevent it from dropping too low. Brands like Cemotobike design their long-range battery systems with these usage patterns in mind, and following the care guidelines provided with your specific battery model will always yield the best results. These habits won’t just extend your battery’s lifespan — they’ll keep your range consistent ride after ride.
Ride Ready: Protecting Your e-MTB from Trailhead to Trail
Getting the most out of your fat tire e-MTB doesn’t stop at the trailhead — it starts long before you hit the dirt. Every section of this guide connects to a single goal: making sure your ride experience is smooth, safe, and repeatable without unnecessary setbacks along the way.
Choosing the right fat tire bike rack sets the foundation. A hitch-mounted rack with adequate weight capacity and wide tire compatibility removes the guesswork and protects both your bike and your vehicle. Following a consistent loading and securing process each time you transport your e-MTB eliminates the small mistakes that lead to costly damage. After the ride, a proper cleaning routine keeps your drivetrain and electrical components functioning the way they should, ride after ride. And treating your long-range battery with care — managing heat exposure, charging habits, and storage conditions — protects the most valuable component on the bike for the long term.
For casual riders, these steps might feel like extra effort at first, but they quickly become second nature. The payoff is real: less time dealing with damage, repairs, or range loss, and more time actually riding. Take these tips with you on your next outing, apply them consistently, and you’ll find that the logistics of owning a fat tire e-MTB become just as enjoyable as the rides themselves.