There’s nothing quite like the rush of carving down a fresh powder slope, the wind cutting past you as the mountain opens up ahead. For many skiers and snowboarders, the next natural instinct is to capture that feeling — to bottle it up and share it with friends, family, or the world. But anyone who’s tried knows the frustration: shaky handheld footage, a helmet cam that slips mid-run, or a perfect trick that happened too fast to catch.
Camera goggles are quietly changing the game for tech-savvy riders who want cinematic slope videos without the hassle of juggling extra equipment. By integrating a camera directly into your eyewear, these smart devices let you record exactly what you see, hands-free and in real time. Yet owning a pair is only half the battle — knowing how to set them up, position them correctly, and turn raw footage into shareable content makes all the difference. This guide walks you through every step, from picking the right smart ski goggles to editing and posting your best runs, so you can focus on what matters most: riding hard and sharing the experience.
Understanding Camera Goggles: Beyond Basic Snowboard Goggles
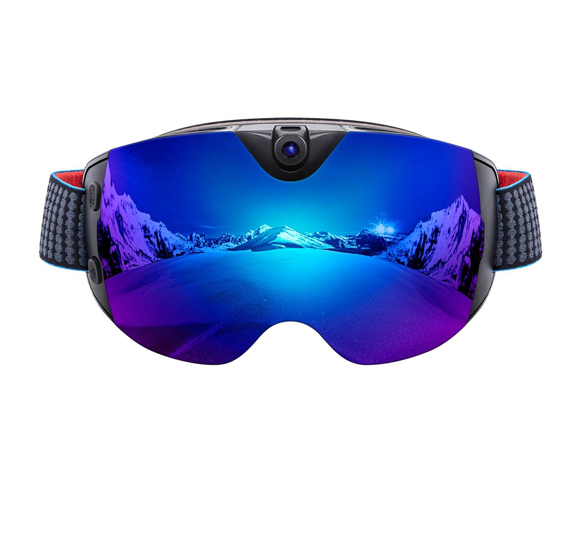
Camera goggles are a natural evolution of traditional ski and snowboard goggles, embedding a compact digital camera — and sometimes a heads-up display — directly into the goggle frame. Rather than strapping a separate device to your helmet or holding a phone at arm’s length, you wear the technology on your face, capturing footage from your exact line of sight. The result is an authentic first-person perspective that no chest mount or pole selfie can replicate.


The advantages over conventional action cameras are significant. Helmet-mounted cameras sit above your natural field of vision, creating an awkward angle that rarely matches what you actually saw on the slope. Handheld options are simply impractical at speed. Camera goggles eliminate both problems by keeping the lens centered at eye level, recording what you see the moment you see it — no repositioning required mid-run.
Modern smart ski goggles go well beyond a basic lens. Many models incorporate high-definition sensors capable of 4K recording, built-in image stabilization to smooth out the inevitable vibrations of mogul fields, and companion apps that connect via WiFi or Bluetooth. Some premium snow goggles even feature small integrated displays that show battery status, recording indicators, or navigation data without requiring you to pull out your phone. Understanding these layers of functionality is the foundation for using them effectively, and it’s what separates a frustrating experience from genuinely cinematic slope footage.
Choosing the Right Smart Ski Goggles for Your Adventures
Walking into a ski shop — or scrolling through an online retailer — and picking the first pair of camera goggles you see is a reliable way to end up disappointed on the mountain. The right choice depends on matching specific features to how you actually ride, what conditions you typically face, and how you plan to use your footage afterward. Start by thinking about your riding style: a backcountry powder hunter has very different needs than a park rider throwing tricks in the terrain park.
Key Features to Prioritize
Resolution is the obvious starting point, but it’s not the whole story. Look for goggles that shoot at least 1080p at 60 frames per second — this gives you smooth playback and enough detail to hold up on a large screen. If you want to crop or stabilize footage in post, 4K recording gives you that extra headroom. Built-in image stabilization matters enormously on the mountain, where every mogul and edge catch translates into vibration. Without it, even well-composed shots look like they were filmed during an earthquake.
App compatibility is another non-negotiable for anyone serious about sharing content. Goggles with WiFi connectivity let you preview footage, adjust settings remotely, and transfer clips to your phone without pulling a memory card. Bluetooth adds a secondary layer for quick pairing and remote shutter control. Storage options vary widely — some models rely on internal memory, while others accept microSD cards up to 256GB, which is far more practical for full-day sessions. Battery life should cover at least two to three hours of continuous recording, accounting for cold temperatures that drain cells faster than the spec sheet suggests.
Top Models and Recommendations
The market currently splits into two broad camps. Entry-level camera goggles from brands like Oakley’s experimental lines and smaller action-sports companies offer solid 1080p recording and basic app connectivity at a more accessible price point — a sensible starting place if you’re unsure how often you’ll actually use the feature. Premium options, including models from Zeal Optics, ohosunshine, and other purpose-built smart goggle manufacturers, step up to 4K sensors, superior optical lenses with interchangeable tints, and more robust companion apps. The trade-off is weight and battery management. Whichever tier you choose, prioritize lens quality independent of the camera — you still need genuine UV protection and optical clarity, because no amount of great footage compensates for a day of eye strain on a bluebird afternoon.
Setting Up Your Goggles with WiFi for Optimal Performance
Getting the most from your camera goggles starts well before you click into your bindings. A proper first-time setup at home — where you have warmth, patience, and a reliable internet connection — saves you from fumbling with menus on a cold chairlift. Begin by charging the goggles fully using the supplied cable; a complete charge typically takes two to three hours and gives you an accurate baseline for real-world battery performance. While they charge, download the manufacturer’s companion app to your smartphone and create an account if required.
Once charged, power on the goggles and open the app. Most models broadcast their own WiFi network during pairing — look for it in your phone’s WiFi settings and connect using the default password printed in the manual. After the initial handshake, the app takes over and walks you through firmware updates, which are worth installing even if they take a few extra minutes. Outdated firmware is a surprisingly common cause of connectivity drops and recording glitches on the mountain.
Pairing and Connectivity Steps
With the app connected, navigate to the video settings menu and configure your resolution and frame rate before your first session. For general slope footage, 1080p at 60fps strikes the best balance between file size and smooth playback. If you’re shooting in bright, high-contrast conditions or planning significant post-production work, switch to 4K at 30fps. Set the field of view to wide for open runs and narrow it slightly for park tricks where you want the subject closer in frame. Enable the recording indicator light if your model supports it — a small but useful reminder that the camera is actively rolling.
Troubleshooting connectivity issues is usually straightforward. If the app fails to detect the goggles, toggle the goggle’s WiFi off and back on, then force-close and reopen the app. Interference from crowded lodge WiFi networks can disrupt pairing, so complete the initial setup at home rather than at the resort. For Bluetooth-only functions like remote shutter triggering, keep your phone within ten meters and ensure no other paired devices are competing for the signal. Once everything syncs reliably indoors, the connection holds consistently on the mountain.
Mastering Techniques for Capturing Perfect Slope Videos
Even the best camera goggles produce mediocre footage if you don’t think deliberately about how you’re using them. The good news is that a few adjustments to your technique — before and during your run — make a dramatic difference in what ends up on screen. Start with goggle fit: the frame should sit snugly against your face with the lens centered at eye level, not tilted upward toward the sky or angled down at your tips. A loose fit means the camera shifts with every head movement, creating disorienting footage that’s exhausting to watch. Tighten the strap until the goggles feel secure but not uncomfortable, and check the position in a mirror before heading out.
Movement awareness matters just as much as fit. On the mountain, your natural instinct is to look down at your feet or scan the slope erratically — both habits that wreck footage. Instead, practice keeping your gaze directed where you’re actually heading, looking through turns rather than into them. For fast runs, let the speed carry the drama; resist the urge to whip your head around mid-carve. When you want to capture a specific feature like a jump or a tight tree line, approach it with your head already pointed at the target so the camera has a clean run-up rather than a last-second pan.
Positioning and Stability Tips
For pure point-of-view shots on groomed runs, keep your head level and your chin slightly tucked — this naturally angles the lens forward rather than skyward. Park riders benefit from a slightly higher goggle position to capture the full arc of jumps and rails in frame. If your goggles support electronic image stabilization, keep it enabled at all times; the processing overhead is worth it on anything rougher than groomed corduroy. On mogul fields or powder, bend your knees more aggressively to absorb terrain changes through your legs rather than your upper body — your core and head stay steadier, and the footage reflects it immediately.
Lighting and Environmental Adjustments
Lighting on a mountain changes faster than anywhere else. On bluebird days, snow glare is your biggest enemy — it blows out highlights and flattens contrast. Switch to a polarized or mirrored lens tint if your goggles support interchangeable lenses, and enable exposure compensation in the app to pull detail back into bright snow surfaces. Brands that specialize in eyewear optics, like ohosunshine, emphasize the importance of quality lens coatings that handle both UV protection and glare reduction simultaneously — a detail that pays dividends both for your eyes and your footage. Flat light on overcast days presents the opposite challenge: low contrast makes terrain features disappear. In these conditions, shoot at wider apertures or boost contrast slightly in your camera settings to compensate. Cold temperatures below -10°C can cause condensation on the inner lens, which ruins footage mid-run; keep a microfiber cloth accessible and let the goggles acclimatize outside the lodge for a few minutes before shooting. For slow-motion captures of specific tricks, switch to 120fps at 1080p ahead of time — you can’t retroactively change frame rate after the moment passes.
Editing and Sharing Your Camera Goggle Footage Effortlessly
Capturing the footage is only half the story — what you do with it afterward determines whether those runs stay buried on a memory card or actually reach an audience. The good news is that modern camera goggle ecosystems are designed with sharing in mind, and the gap between raw clip and polished post has never been smaller. Transfer footage to your phone via the companion app’s WiFi connection while you’re still on the chairlift, and you’ll have material ready to work with before the day even ends.
Quick Editing Workflows
For fast turnarounds, mobile apps like CapCut, GoPro Quik, or InShot handle the essentials without requiring desktop software. Import your clips, trim the dead air from the beginning and end of each run, and arrange your best moments in sequence. Apply stabilization if your goggles didn’t handle it in-camera, then add a music track to carry the energy — most apps include royalty-free libraries that won’t trigger copyright flags on upload. Color grading is worth a quick pass: boost contrast slightly, lift shadows to recover detail in dark tree sections, and cool the white balance to emphasize the blue-tinted snow tones that make mountain footage feel cinematic. Keep edits under two minutes for social media; attention drops sharply after that threshold.
Sharing Platforms and Best Practices
Instagram Reels and TikTok favor vertical crops and punchy edits under sixty seconds — ideal for a single highlight trick or a fast groomer run. YouTube suits longer full-run edits where viewers want the complete experience. When uploading, export at the highest resolution your platform supports and use relevant hashtags like #skilife, #snowboardpov, or #slopevideo to reach communities already searching for this content. Always review footage for other riders’ faces before posting publicly, and keep audio levels balanced so wind noise doesn’t overpower the music.
See also: Securing Your Future: Understanding Life Insurance in Australia
From First Run to Final Edit: Making the Most of Camera Goggles
Camera goggles have genuinely transformed what’s possible for everyday riders who want to document their time on the mountain. What once required a dedicated camera operator, expensive rigs, or awkward helmet mounts now fits naturally into your face, recording your exact perspective without interrupting a single turn. The journey from purchase to polished post breaks down into four straightforward stages: choosing goggles that match your riding style and conditions, setting them up properly at home before your first session, applying deliberate technique on the slope to capture stable and well-lit footage, and using mobile editing tools to shape raw clips into content worth sharing.
None of these steps demand professional filmmaking knowledge — they reward curiosity and a willingness to experiment. Your first few runs with camera goggles will teach you more than any guide can, revealing which angles excite you, which lighting conditions suit your style, and how your natural riding rhythm translates on screen. The footage only gets better as the habits become automatic. So charge up those goggles tonight, dial in your settings, and head to the mountain ready to ride and record. When you nail that first clean run or land a trick you’ve been working toward all season, don’t let it sit on a memory card — share it, and inspire someone else to start capturing their own slopes.