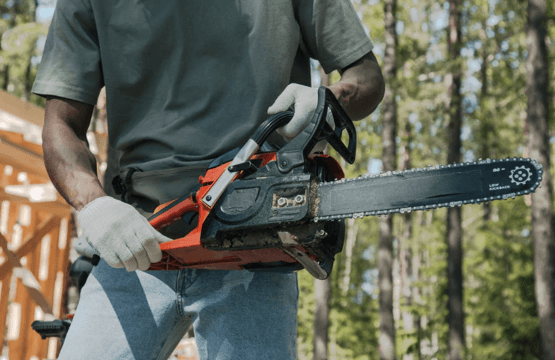
If you’re like me, you enjoy spending time outdoors in the summer. There’s nothing quite like spending a day in the sun, surrounded by trees and green space. That’s why I love chainsawing. It’s the perfect way to quickly and easily create space for picnics, yard games, and relaxation. But if your chainsaw isn’t sharp, all that fun can quickly turn into a chore. In this blog post, I’m going to show you how to sharpen a chainsaw. The source of information for this guide is Sawpicks.com blog.
Steps to Sharpen a Chainsaw
Following is the step-by-step guide on how to sharpen a chainsaw:
1. Get to know your chainsaw
The first step in learning how to sharpen a chainsaw is getting to know your chainsaw. This may seem like an obvious statement, but it’s important to understand the different parts of your chainsaw and how they work together. This will help you when it comes time to actually sharpen the chain.


The main parts of the chainsaw are:
- The bar
- The chain
- The sprocket
- The engine
The bar is a long metal piece that extends from the front of the chainsaw. This is where the chain sits.
The chain is a loop of metal teeth that spins around the bar. These teeth are what do the cutting.
The sprocket is a small wheel inside the chainsaw that the chain sits on. This wheel helps to drive the chain around the bar.
The engine is what powers the whole chainsaw. It is usually located at the back of the chainsaw.
2. Pick the right Tools for sharpening Chainsaw
Now that you know the different parts of the chainsaw, it’s time to pick out the right tools for sharpening. You’ll need:
- A file
- A depth gauge tool
- A drive link plier
- A bar clamp
The file is what you’ll use to actually sharpen the chain. There are many different sizes and shapes of files, so be sure to get one that is meant for chainsaws.
The depth gauge tool is used to make sure that the teeth on the chain are all the same length. This is important for safety and efficiency.
The drive link plier is used to remove the chain from the bar. This is an important step in sharpening the chain, so be sure to get a good quality plier. The bar clamp is used to hold the bar in place while you sharpen the chain.
3. Inspect the chain for wear and tear:
Before you start sharpening, it’s important to inspect the chain for wear and tear. Look for any broken or damaged links. If you find any, use the drive link plier to remove them from the chain.
Next, use the depth gauge tool to check the teeth on the chain. If any of the teeth are longer or shorter than the others, use the file to even them out.
4. Clean the chain and lubricate it:
Now that the chain is repaired and all of the teeth are the same length, it’s time to clean it. Use a brush to remove any dirt or debris from the chain. Then, use a cloth to wipe it down.
Once the chain is clean, you’ll need to lubricate it. This will help protect it from rust and wear. You can use any type of oil for this, but I prefer using WD-40. Just spray a light layer onto the chain and let it dry.
5. Adjust the chain tension:
The next step in sharpening your chainsaw is adjusting the chain tension. This is important because if the chain is too loose, it can come off of the bar while you’re using it. Conversely, if the chain is too tight, it can damage the bar.
To adjust the chain tension, use the bar clamp to hold the bar in place. Then, use the depth gauge tool to measure the length of the chain. The ideal length is two and a half inches (6.35 cm). If the chain is too long or too short, use the file to adjust it.
6. Sharpen the chain’s cutting teeth:
Now it’s time to actually sharpen the chain. First, use the depth gauge tool to check the depth of the teeth. The ideal depth is one-eighth of an inch (0.3175 cm). If the teeth are too shallow, use the file to deepen them. If they are too deep, use the depth gauge tool to remove some of the metal.
Once all of the teeth are the correct depth, use the file to sharpen them. Start at the base of each tooth and file up towards the tip. Be sure to keep the file level so that all of the teeth are sharpened evenly.
After you’ve sharpened all of the teeth, use a cloth to clean off any metal filings. Then, use the depth gauge tool to check the depth of the teeth one last time.
Conclusion
Congratulations! You’ve now learned how to sharpen a chainsaw. Be sure to follow these steps regularly to keep your chainsaw in good condition. If you have any questions. please as in the comment section.