Every year, house fires claim thousands of lives — many of which could have been prevented with faster detection and smarter response systems. Traditional smoke alarms do their job, but they operate in isolation, leaving you dependent on being within earshot when seconds truly matter. Managing multiple alarms across different rooms adds another layer of complexity, especially in larger homes where a bedroom detector and a kitchen sensor have no way of communicating with each other.
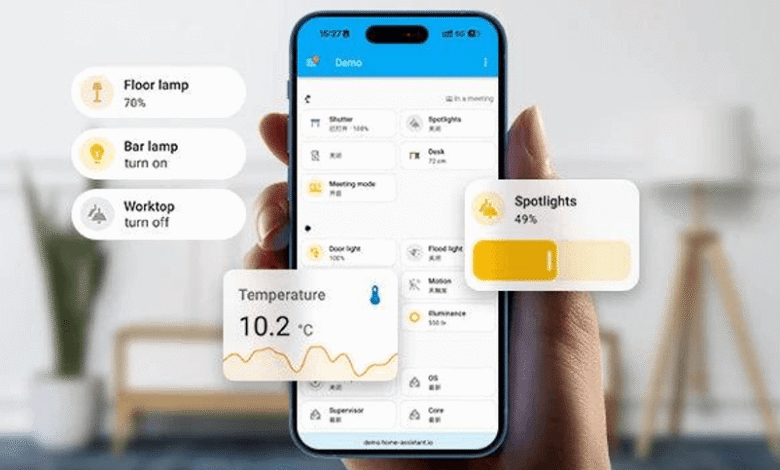
Home Assistant changes that equation entirely. As an open-source, locally controlled smart home platform, it lets you unify every smoke alarm in your home into a single, responsive system — without surrendering your data to third-party clouds. For tech enthusiasts who prioritize both security and customization, this combination is hard to beat.
This guide is written specifically for those who want a thorough, practical walkthrough. You’ll find everything from understanding the fundamentals of multi-room smoke alarm integration, to preparing your hardware, executing a step-by-step setup, and unlocking advanced automation features — all while keeping your smart home private and fully under your control.


Understanding Multi-Room Smoke Alarms and Smart Home Automation
Multi-room smoke alarms are interconnected detection devices designed to communicate across an entire home rather than operating as isolated units. When one triggers, all alarms sound simultaneously — a critical advantage in larger homes where a fire starting in the basement might go unheard by someone sleeping on the third floor. Traditional alarms fulfilled this basic function through hardwired connections, but modern smart versions take that concept considerably further by adding wireless communication, remote monitoring, and integration with broader home automation platforms.
The evolution from conventional detectors to smart devices didn’t happen overnight. Early interconnected systems required physical wiring between units, limiting flexibility and installation options. The arrival of wireless protocols like Z-Wave and Zigbee changed everything, enabling battery-powered or plug-in devices to join a mesh network without a single cable. Today’s smart smoke alarms can report their status in real time, identify which specific room triggered an alert, and feed that information directly into platforms like Home Assistant.
Home Assistant sits at the center of this ecosystem as an open-source automation platform that runs locally on your own hardware. Unlike subscription-based systems, it doesn’t route your data through external servers. It supports thousands of devices across dozens of protocols, making it uniquely suited for building a cohesive safety network from mixed hardware.
Benefits of Integrating Smoke Alarms with a Smart Home System
Connecting your smoke alarms to Home Assistant transforms passive detectors into active participants in your home’s safety strategy. You gain remote monitoring through the Home Assistant app, meaning a notification reaches your phone whether you’re in the backyard or across the country. Beyond alerts, integration enables powerful automation triggers — detecting smoke can automatically turn on every light in the house for safe evacuation, unlock smart door locks, shut down HVAC systems to slow smoke spread, and activate an indoor siren louder than any single alarm. These layered responses dramatically compress the time between detection and action.
Why Home Assistant is Ideal for Privacy-Conscious Users
Most commercial smart home platforms — Google Home, Amazon Alexa, and even some alarm manufacturer apps — depend on cloud servers to process commands and store device data. That means your home’s safety events are logged on someone else’s infrastructure. Home Assistant operates entirely on your local network by default. Device states, automation triggers, and historical data never leave your premises unless you explicitly configure external access. For tech enthusiasts who treat network sovereignty as non-negotiable, this architecture is the defining advantage. You control the hardware, the software, and every byte of data your system generates.
Preparing Your Setup for Seamless Device Integration
Before a single smoke alarm communicates with Home Assistant, your environment needs to be ready to support that relationship. Rushing into device pairing without addressing hardware compatibility, network stability, and software configuration is the fastest route to frustration. Taking thirty minutes to audit your setup beforehand saves hours of troubleshooting later.
Network stability is the foundation everything else rests on. Home Assistant depends on consistent local network communication, so a router with strong 2.4GHz and 5GHz coverage across your home is essential. If your installation spans multiple floors, consider a mesh network system to eliminate dead zones that could cause devices to drop offline unpredictably. A wired Ethernet connection for your Home Assistant hub is strongly recommended over Wi-Fi — it removes one variable from an already complex system.
Required Hardware and Compatible Smoke Alarm Models
Your choice of smoke alarm protocol shapes every decision that follows. Z-Wave and Zigbee devices are the preferred options for Home Assistant users because both operate on mesh networks, support local control without cloud dependency, and have mature integration support. First Alert’s Z-Wave combination smoke and CO detectors pair reliably with Home Assistant through a Z-Wave USB stick like the Zooz ZST10 or Aeotec Z-Stick 7. For Zigbee users, the SONOFF Zigbee Dongle-P or ConBee II adapter handles device pairing through the ZHA (Zigbee Home Automation) integration built into Home Assistant. X-Sense’s interconnected smoke alarm lineup is also worth considering for households that want reliable multi-room coverage with straightforward setup before bringing devices into a Home Assistant environment.
Wi-Fi-based alarms, such as certain Nest Protect models, can work through local API access but require additional configuration steps and carry more cloud dependency risk. If you’re starting fresh, Z-Wave or Zigbee hardware gives you cleaner local control. Beyond smoke alarms, your hub hardware matters equally — a Raspberry Pi 4 running Home Assistant OS is the most common and well-documented setup, though a dedicated NUC or a repurposed mini PC works just as well.
Initial Installation and Configuration of Home Assistant
Home Assistant OS is the recommended installation method for most users because it handles updates, add-ons, and supervisor functions automatically. Flash the Home Assistant OS image to a microSD card or SSD using the Balena Etcher tool, insert it into your Raspberry Pi, connect it to your router via Ethernet, and power it on. After a few minutes, navigating to homeassistant.local:8123 in your browser opens the onboarding wizard. Create your user account, set your location for accurate time zone and sunrise/sunset data, and complete the initial setup.
Once inside the dashboard, navigate to Settings → System → Hardware to confirm your USB protocol adapter is recognized. Install the Z-Wave JS or ZHA integration depending on your hardware, then verify the integration is active under Settings → Devices & Services. At this stage, your Home Assistant instance is ready to discover and pair smoke alarm devices — a clean foundation before any alarm gets added to the network.
See also: Maintaining a Cleaner and Healthier Home Environment
Step-by-Step Guide to Integrating Multi Room Smoke Alarms with Home Assistant
With your hardware in place and Home Assistant running, the actual integration process breaks into three distinct phases: pairing devices to your network, configuring them inside Home Assistant, and validating the entire system works as expected. Working through each phase methodically prevents the most common integration headaches and gives you a reliable baseline before adding any automation logic.
Choosing and Connecting Your Smoke Alarms via Z-Wave, Zigbee, or Wi-Fi
For Z-Wave devices, open Home Assistant and navigate to Settings → Devices & Services → Z-Wave JS. Click “Add Device,” then put your smoke alarm into pairing mode — typically by pressing and holding the test button for three to five seconds until the LED flashes. Home Assistant will discover the device within thirty seconds and prompt you to assign it a name and area. Repeat this process for each alarm, naming them by room (Kitchen Smoke Alarm, Master Bedroom Smoke Alarm) so automations can reference specific locations later.
Zigbee pairing follows nearly the same flow through the ZHA integration. Go to Settings → Devices & Services → Zigbee Home Automation, select “Add Device,” and trigger pairing mode on your alarm. One important note: pair each Zigbee device within close range of your coordinator dongle first, then move it to its permanent location. This ensures the device joins the mesh correctly before relying on neighboring devices as signal repeaters.
Wi-Fi alarms require a different approach. After completing setup in the manufacturer’s app, check whether a local API or Home Assistant community integration exists for your specific model. For compatible devices, install the relevant custom integration through HACS (Home Assistant Community Store), enter your device credentials or local IP address, and the alarm should appear under Devices & Services. Avoid relying on cloud-polling integrations where possible — local API access keeps response times fast and eliminates dependency on external servers staying online.
If a device fails to pair, the most reliable fix is to factory reset the alarm and attempt pairing again from within two meters of your hub or coordinator. Interference from neighboring Wi-Fi channels occasionally disrupts Zigbee pairing; switching your router’s 2.4GHz channel to 1, 6, or 11 resolves most conflicts.
Configuring Automations, Alerts, and Multi-Room Monitoring
Once all alarms appear in Home Assistant with correct room assignments, head to Settings → Automations & Scenes → Create Automation. Set the trigger to “Device” and select your first smoke alarm, choosing “Smoke Detected” as the trigger state. Under Actions, add a mobile notification through the Home Assistant Companion app, a text-to-speech announcement through any connected speakers, and a light scene that turns every light in the house to full brightness. Duplicate this automation for each alarm, adjusting the trigger device and optionally customizing the notification message to identify which room triggered the alert.
For a consolidated dashboard view, navigate to your Lovelace dashboard and add an Entities card listing every smoke alarm’s current state. This gives you a single-glance status panel showing whether each room is clear or has triggered. You can also create a History Graph card to review past detection events — useful for identifying nuisance triggers from cooking steam or bathroom humidity, which can then be addressed by adjusting alarm placement rather than disabling sensors entirely.
Test the complete system before relying on it. Hold a smoke test aerosol briefly near each alarm in sequence and confirm that Home Assistant registers the state change, sends the notification, and executes every linked action. Document any alarms that fail to report and revisit their pairing status under Devices & Services.
Advanced Features and Optimizing Your Privacy-Focused Platform
With your smoke alarms integrated and basic automations running, you’re ready to push the system further. Home Assistant’s real strength emerges when you layer multiple sensors and devices into coordinated safety responses — and when you take deliberate steps to ensure that none of that activity leaks outside your local network.
Ensuring Local Control and Data Privacy in Your Setup
Start by auditing every integration under Settings → Devices & Services and identifying any that rely on cloud polling rather than local communication. Disable or replace cloud-dependent integrations wherever a local alternative exists. For Z-Wave and Zigbee devices, local control is already the default, but Wi-Fi devices deserve closer scrutiny — check whether your alarm’s integration uses a local API or routes through the manufacturer’s servers. If you’ve enabled Home Assistant Cloud (Nabu Casa) for remote access, understand that only your connection is tunneled externally; device data itself stays on your local instance. For users who want zero external exposure, configure a WireGuard VPN through the Home Assistant add-on store instead. This gives you secure remote access without any third-party intermediary. Additionally, restrict your Home Assistant instance to your local VLAN, set strong passwords, and enable two-factor authentication under your user profile settings to close off unauthorized access vectors.
Creating Custom Multi-Room Alerts and Notifications
Room-specific alerts go beyond generic push notifications. In your automation editor, use conditional logic to customize the response based on which alarm triggered — a kitchen detection event might include a specific message acknowledging likely cooking-related causes, while a bedroom trigger escalates immediately to a full evacuation sequence. Home Assistant’s script editor lets you build reusable response scripts that any automation can call, keeping your configuration clean and maintainable.
For local voice announcements, pair Home Assistant with a locally hosted text-to-speech engine like Piper, available as an add-on, and route announcements through any media player entity on your network. A detection event in the upstairs hallway can trigger an announcement on every speaker simultaneously, stating the exact room and instructing occupants to evacuate. Combine this with a dedicated safety dashboard in Lovelace — using conditional cards that display prominent visual alerts only when a smoke state is active — and you have both audible and visual notification layers operating entirely within your own infrastructure.
Building a Smarter, Privacy-First Home Safety Network
Building a unified smoke alarm system with Home Assistant is one of the most meaningful upgrades a tech-savvy homeowner can make. You’ve moved through the full journey here — understanding how interconnected smart alarms differ from traditional detectors, preparing your hardware and network for reliable communication, executing the pairing and configuration process across Z-Wave, Zigbee, and Wi-Fi protocols, and finally layering in advanced automations that respond intelligently to threats while keeping every byte of data firmly within your own walls.
The result is more than a collection of connected sensors. It’s a coordinated safety network that notifies you instantly, triggers protective responses automatically, and operates without depending on any manufacturer’s cloud staying online. For privacy-conscious users, that local-first architecture isn’t a compromise — it’s the entire point.
From here, the possibilities expand considerably. Home Assistant’s community forums and the official documentation at home-assistant.io are invaluable resources for discovering new integrations, refining your automations, and solving edge cases as your setup grows more complex. Consider exploring integrations with carbon monoxide detectors, water leak sensors, and smart locks to build a truly comprehensive safety ecosystem. Brands like X-Sense offer combination smoke and CO detectors that fit naturally into a layered sensor strategy for homeowners looking to expand beyond standalone smoke detection. Implement this guide, test every component thoroughly, and share what you learn — your experience contributes directly to a community that makes these systems better for everyone.